How to add a network printer
Adding a network shared printer to your printer list:
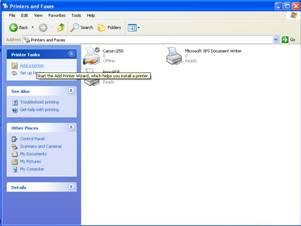
1. Go to Start > Control Panel > Printers and Faxesor Go to Start > Printers and Faxes (depending on how your start menu is setup)
2. Click on the Add a Printer shortcut at the top left side.
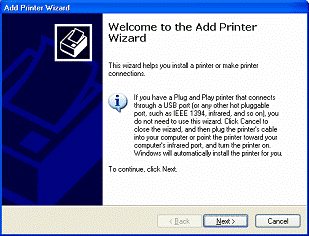
3. You will then see the Welcome to the Add Printer Wizard window. Click next.
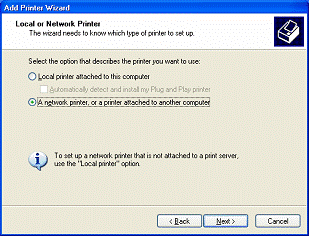
4. At the Local or Network Printer window select the radio button: “A network printer, or a printer attached to another computer” and Click Next.
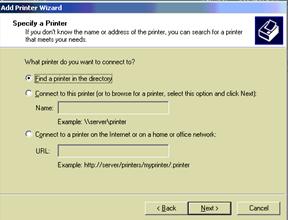
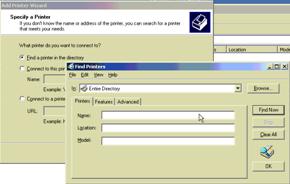
5. At the Specify a Printer window select the radio button: “Find a printer in the directory” and Click Next.
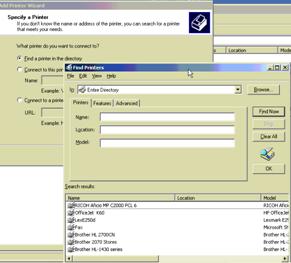
6. At the Find Printers window ensure that in the “In:” box “Entire directory” is displayed. If this is not displayed in the drop down box simply click the box and select this option. When ready click on “find now”.
7. A list of networked shared printers will now be listed. Click the printer you wish to add (this will become highlighted) and click Ok.
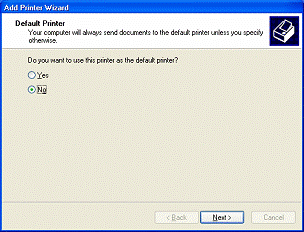
8. At the next window you will be asked if you would like this printer to be your default printer. This means by default any documents sent to print will be printed on this printer. Select Yes or No and Click Next.
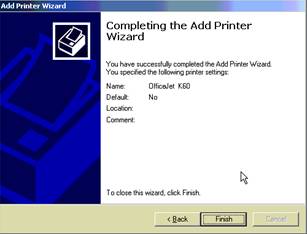
9. You will then see a summary of the settings you chose for the printer you are adding. If you need to change the Option to make this printer a Default Printer (This is the only option you can change at this point.), click the Back button, otherwise, click Finish.
10. The printer that you have selected to add will now be displayed in the printer and faxes window. The printer is now ready for use.
Looking for IT Support in Birmingham? Visit our Partner at IT Support Birmingham